Saturday, 31 December 2011

Business Cards

Had a very exciting package delivered - my business cards arrived - and sooner than expected!! 
I ordered them from Vistaprint. I got 250 matt finish with my own design, an engraved card holder to keep them from getting damaged in my bag, and I got a free stamp. 


Very impressed with the quality of everything and was all very cheap to buy so will definitely get more from them in the future.

2011 has been a fantastic year for me - I'm so glad I decided to take the Pikaland bootcamp course which helped me to to rediscover new enthusiasm for my artwork - heres to a fun and creative 2012!! :)

Friday, 23 December 2011

Merry Christmas!

Christmas has to be my favourite time of year - I'm really looking forward to a few days rest and spending time with family. Few last minute things to do before I'm ready though! Adam and I picked up some prints of his photos this morning from Replica Imaging which I've mounted and framed as presents, and this afternoon I've been baking and prezzie wrapping with some festive films on in the background.

My website is still under construction but I'll be working on it over the next few weeks and aiming for it to be online in the new year along with the first few items for sale in my etsy shop. Am so excited to get it all up and running!

I hope you all have a fantastic Christmas - thanks for your support and interest in my work x

Wednesday, 21 December 2011

Art Technician Insight

Hooray for the Christmas Holidays and two weeks off work! It's the last day of term for me and I've enjoyed a few quiet days this week with the art dept to myself as the Teachers and Students finished last Friday. I've been stock checking, ordering, tidying cupboards and doing a bit of scanning. Scanning in books is one of the few jobs I can do sat down as I'm normally on my feet all day, and it forces me to look through books that I wouldn't normally pick up and introduces me to new artists, so I really enjoy it.

We have an ongoing resource full of scanned images saved on the students area of the computer so that everyone can access it. We call it the Artists A-Z and it's in constant use. We know that all the images saved in there are high quality and are really easy to find. Theres even a notice up next to all the computers reminding students how to find it!
One of the books I've been scanning is a new book which arrived last week called Patchwork Folk Art by Janet Bolton. The book has lots of illustrations and with helpful practical notes. Her designs are rustic, simple, inspirational but also achievable, and use quite simple techniques. I especially like the multiple pieces with more abstract compositions because a lot of them reminded me of old fashioned puzzles and games. We are using textiles more and more each year and I think this book will be really useful especially with exam units coming up.

Thursday, 15 December 2011

The Wonder of Christmas Lights

We put up our Christmas Tree at the weekend! No Christmas Tree would be complete without lights - and my absolute favourite are the flower lights in all different colours. When I switched them on to test them I noticed the beautiful patterns that were made on the floor so I got my camera out - 2 hours later I was still taking photos!!


Sunday, 11 December 2011

Glass Workshop

What better way of doing some Christmas shopping than learning a new skill and making some presents at the same time! Especially if lunch is included too ;) I recently did a glass workshop at a local gallery The Beetroot Tree with Stevie Davies.

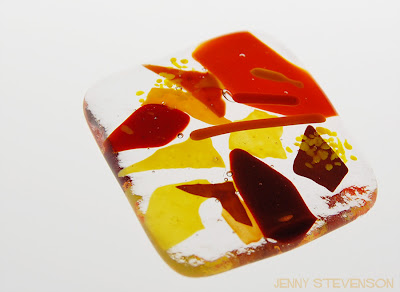
At the start of the day we were given a starter pack of glass pieces to have a go straight away so that we could get one fired on the day to take home. These are the pieces I got...
Here are my arranged pieces of glass in the kiln ready to be fired with everyone elses - it takes about half an hour to get up to temperature, then about 2 1/2 hours to cool down.
Next it was on to designing our own pieces to use as jewellery - here are Stevie's samples that we used to get our inspiration from. We also had a go at practicing to cut glass with some cheap window glass, I was surprised at how easy it was to cut and the minimal amount of tools needed for the entire process. Points to take into account were to disguise where the findings were going to be placed and to balance your glass pieces so that they wouldn't slip in the kiln.
I wanted to keep the glass work true to the artwork I've been recently creating. Using the glass to create lots of transparent overlapping layers and a mix of shapes and colours with a sense of movement around the piece. I was very hard to work with the glass without any idea of the final outcome. I asked so many questions but learnt a lot! 

3 hours later - my first piece was fired and ready to take home!
I collected the others a few days later after they had been fired. I managed to get 12 pieces ready for firing by the end of the day. Some of them are pictured below - the rest I'll keep a secret until after Christmas - I dont want to ruin the surprise for anybody!
I really enjoyed the workshop and it's opened up lots of possibilities for my artwork. I was overwhelmed by the amount we managed to get done in a day and am very pleased with the results. I'll be buying some glass in the new year from UK suppliers Warm Glass, and having another go. Thanks Stevie for all your help!

Thursday, 8 December 2011

ShapeMaker Wooden Block Video

I absolutely love this video - so ingenious what you can create out of a few shaped blocks! Enjoy...

Saturday, 3 December 2011

Inspiration from Rachel Gornall

I've been missing out on a treat for months now - I just found out that the library at work has been subscribing to Embroidery magazine!
It's packed full of colourful features on contemporary and traditional textiles, book reviews and a guide to what's on. I spent a whole lunchtime flicking through all the back issues - my favourite one was May-June 2011 where I found a fantastic article about the artist Rachel Gornall
I was instantly drawn to her work, particularly because of the precision, colour and layers. As I read through the article I found out that she uses two layers of hand dyed cotton organdie fused together, and was surprised to find that she cut all the shapes by hand using a combination of a scalpel and compass cutter.
Light is very important to Rachel's work - the cut outs, suspended shapes and stitched sections on the different layers create shadows and an interaction between the layers and give the pieces movement and depth. The colour explores the rhythms and patterns of nature, and changes in light and colour. She draws her inspiration from her local river in London, the shorelines of Britain and her travels across Central and South America.
 
Rachel also mentions the difficulties with photographing the work - because of the translucency the flash goes through the fabric and bounces back. After spending hours and hours photographing my own work I can really sympathise! I particularly love the close up photographs which show the layers through the translucent fabric. It forces you to see the work in a whole new way and I love the new shapes and tones that occur as a result.

Rachel Gornall has work showing in Objects of Desire 2011, 19th Nov 2011 - 14th Jan 2012 at the Chapel Gallery, West Lancs. I hope I get time to go and see it. 

Thanks Rachel Gornall and Embroidery magazine - I am inspired!

Monday, 28 November 2011

We love your books

For those of you interested in artists books, I can wholeheartedly recommend exhibiting with Melanie Bush and Dr Emma Powell of we love your books.

I have submitted books for both the RE: and Closure exhibitions at Northampton University and Milton Keynes Artworks MK. I am always so impressed with the exhibitions they produce - they used a mix of furniture, bookcases and coffee tables to display the work in a interesting and unique way, and they do all this with no budget.

RE: Exhibition


Closure Exhibition

This year is an online exhibition on the theme of minute and a small selection will appear in cases at The University of Northampton. The deadline for Entries is 1st June 2012 so you have plenty of time to make and submit a book or even two!


Thursday, 24 November 2011

Paper Grain: A Tutorial

So - Why do we need to know about paper grain direction?

Well I want to share some book making tutorials with you - the direction of the grain makes a huge difference when folding paper so it’s important to explain a bit about it first.

I just love paper! When you work in harmony with it you can create some fantastic things but when you try and force it to do something it doesn't want to do it can fight back!

Paper folds much easier with the grain than against the grain. Folding against the grain can cause all sorts of problems such as cracks, warping and curling which makes the finished book lay less flat when it’s closed and open. If you’re making a book where several layers of paper are glued together, the paper grain of all the papers need to run parallel to the spine.

Grain is created by the machinery used to make paper so handmade paper won’t have a grain. Although it has an interesting texture and variety of colours I rarely use it for bookbinding as it tends to crack when folded.


Here is the method I use to determine the direction of paper grain - 
it works well for most papers.

1. Lay the paper flat in front of you. Take the left edge over to the right to meet the    opposite end of the paper but don’t fold. Press gently with the palm of your hand where it curls. Judge the pressure – does it compress easily or does it have some resistance?
2. Open the paper flat again and turn round 90 degrees. Repeat the process. How does it feel compared to the other way
 
3. The way that is easiest to compress indicates the direction of the grain. All folds should be parallel to this.
4. If it’s a paper I use a lot I make a note of it so I don’t have to test it every time.

Greyboard is often used to make the covers and it also has a grain – if you are putting hard covers on a book it’s essential that the grain runs parallel to the spine as it can curl and warp when you glue it. You won’t be able to bend it to meet the edges as above but you can tell by bending it gently in your hands, one way will bend more easily. When you find out the grain direction it is best to draw faint parallel lines in the direction of the grain in pencil over the surface so when you get offcuts you can easily see which way up it needs to go.

These are the UK paper suppliers that I know and trust;
Shepherds Book Binders (formerly Falkiner Fine Papers)
Seawhite of Brighton